Creating Printable Painting Guides for Students
· Editorial Team · 13 min read
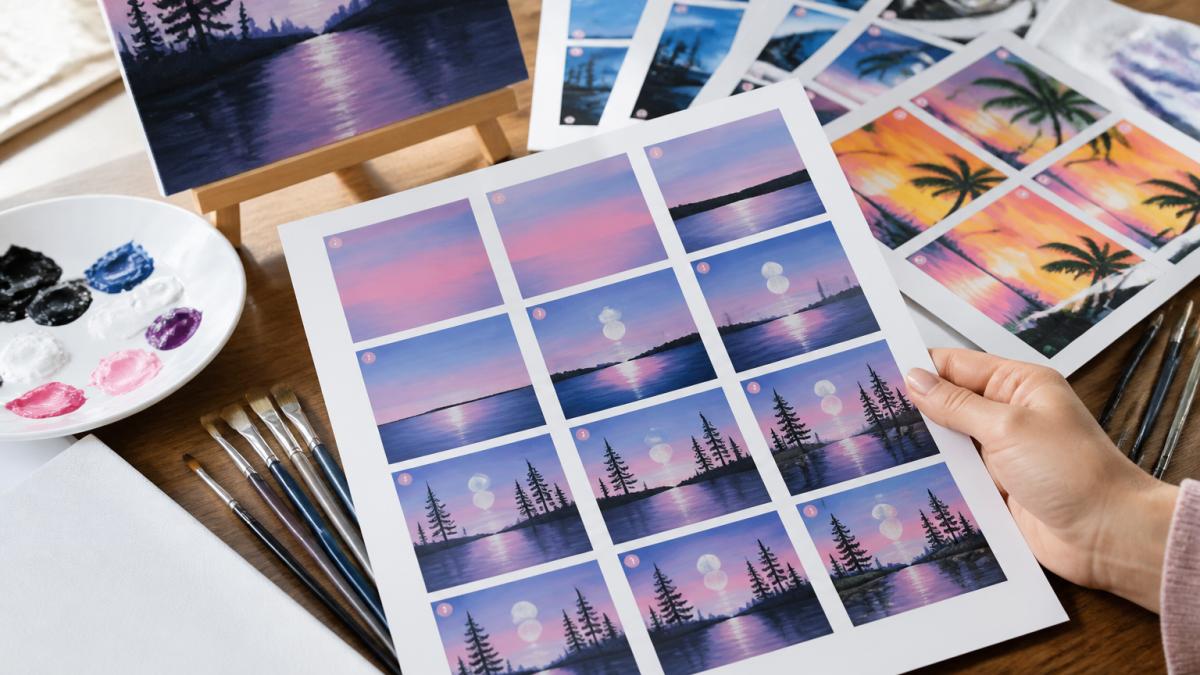
Table of Contents
- What You'll Need Before You Start
- Step 1: Choose Easy Painting Ideas for Beginners
- Step 2: Build the Art Lesson Plan Templates
- Step 3: Write the Step-by-Step Instructions
- Step 4: Add Visual Aids and Shape Guides
- Step 5: Format and Print the Guides
- Painting Class Preparation Tips for Printable Guides
- Common Mistakes to Avoid
- Frequently Asked Questions
Last Updated: October 1, 2026
What You'll Need Before You Start
Creating printable painting guides for students starts with the right tools and a clear plan. You need a design app, a printer, paper, and a tested painting idea. Get these in place first, and the rest of the process moves fast.
Here's your supply list:
- A design tool (Canva, Google Slides, or Adobe Express)
- A home printer that handles 8.5 x 11 inch paper
- Cardstock or matte paper, 65 lb or heavier
- A color printer, or a print shop for color copies
- Acrylic paint in five to seven colors
- A set of flat and round brushes
- A canvas or watercolor paper for each student
- A palette, paper plates work fine
- A pitcher of water and paper towels
- A binder or folder to store your master guides
Step 1: Choose Easy Painting Ideas for Beginners
Pick subjects with big shapes and few colors. A sunset, a single flower, or a simple landscape works because beginners can block in the main shapes fast.
- Two or three main shapes, not twenty
- A limited palette of four to six colors
- A forgiving background that hides small mistakes
Picking Compositions That Work on Paper
Composition matters more than subject. Center the main shape and leave open space around it.
Step 2: Build the Art Lesson Plan Templates
A reusable art lesson plan template saves you hours every month. Build one master file, then swap the artwork and steps for each new class. This is the step most guides skip, they hand you a finished tutorial instead of teaching you to produce the printable yourself. That's the gap this section closes.
Your template should include:
- A title and a small finished-painting image
- A materials list with exact colors
- A color swatch strip students can match
- Numbered steps with room for a small sketch
- A shape guide for blocking in the design
- A short "tips" box for common fixes
Set Up the Master File in Your Design Tool
Open Canva, Google Slides, or Adobe Express and create a new document sized to 8.5 x 11 inches, the standard US Letter sheet your printer and copier expect. Set the document to portrait orientation and turn on a half-inch margin guide on all four sides so nothing lands in the unprintable edge.
Lock the Reusable Elements
Name your layers or text styles so a swap is fast. In Canva, group the title block and save it as a reusable element. In Google Slides, build the layout on the slide master so every new page inherits the same margins and fonts. In Adobe Express, save the file as a template so you can duplicate it without touching the original.
- Title text
- Finished-painting photo
- Color swatch strip
- Shape guide sketch
- Step text and step sketches
- Tips box content
Export Settings That Print Correctly
Export as PDF, not as a JPG or PNG. A PDF keeps text sharp at any size and preserves your margins. When you export, choose the print-quality or high-quality preset and make sure the file is set to actual size, not "fit to page", fit-to-page shrinks your margins and can clip the footer.
What Goes in Each Template Section
Keep each section short. A guide that runs six pages won't get read.
Step 3: Write the Step-by-Step Instructions
Write each step as one action. One step, one brush, one color.
Step 4: Add Visual Aids and Shape Guides
Visual aids do more for beginner success than any written instruction. Add a shape guide that shows students how to block in the design with simple outlines.
Include these visual aids in every guide:
- A finished-painting photo at the top
- A shape guide showing the basic outline
- A color swatch strip with labeled names
- Small sketches beside tricky steps
Step 5: Format and Print the Guides
Format for a single page per section, then print. Use a clean font at 14 point or larger so students can read it from arm's length.
Painting Class Preparation Tips for Printable Guides
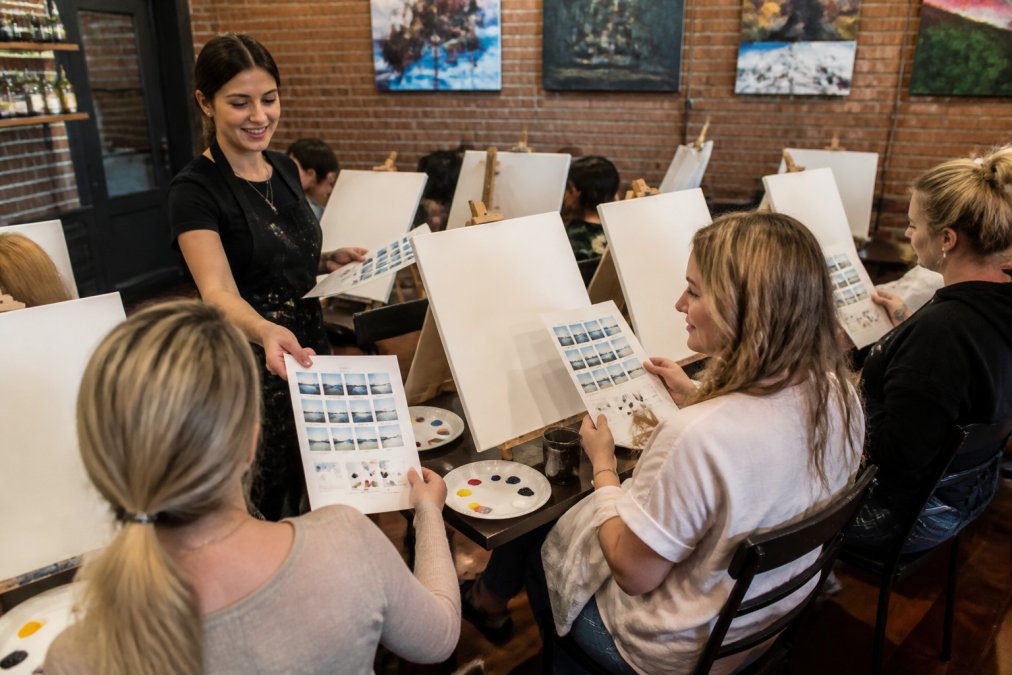
Prep work decides whether a class runs smoothly. These painting class preparation tips keep you ahead of the room, and they build in the inclusive design most printable guides ignore entirely.
Standard Prep Checklist
- Print one extra guide per three students
- Pre-pour paint into small cups before guests arrive
- Tape the shape guide to each easel
- Set brushes and water cups at every station
- Keep a master binder of every guide you've taught
Budget tip: buy cardstock in bulk and print double-sided. It cuts paper cost and keeps each guide to fewer sheets. A ream of 65 lb cardstock runs far less per sheet than single-sheet retail packs, and double-sided printing halves your sheet count on any guide longer than two pages.
Design for Accessibility From the Start
Most printable painting guides are built for one kind of student. Inclusive design means the same guide works for a student with a motor skill challenge, a student with low vision, and a student who processes written steps slowly. Build these adaptations into the master file so you don't have to retrofit them later.
For motor skill challenges:
- Enlarge the shape guide to fill a full page so students trace rather than freehand
- Add a dotted-line version of the outline students can follow with a brush
- Offer a wider flat brush as the default tool, it covers more area with less fine control
- Break each step into a single brushstroke where possible
For sensory processing needs:
- Note the texture and smell of each paint on the materials page so students know what to expect
- Offer a no-scent or low-odor paint option in the materials list
- Keep the layout uncluttered, white space reduces visual overload
- Use a consistent color for step numbers so the eye can track position
For low vision:
- Set body text at 14 point or larger and headings at 20 point or larger
- Use high-contrast line art, black outlines on white, no light gray
- Add a text description of each step beside the sketch, not instead of it
- Offer a large-print version on request, printed at 150 percent
For students who read slowly or process language differently:
- Pair every written step with a sketch so meaning comes through two channels
- Number steps in a large, bold font
- Keep sentences under twelve words
Set Up the Room for the Guide
Prep the physical space to match what the guide promises. If the guide says students start with a shape guide taped to the easel, tape it before they arrive. If the guide lists five colors, pour exactly those five, extra colors on the table invite improvisation that breaks the step sequence.
Run a Prep Audit Before Every Class
Five minutes before students arrive, walk the room and check four things: every station has a guide, every palette has the listed colors, every easel has the shape guide, and every water cup is filled. A missing shape guide at one station is the single most common reason one student falls behind the rest of the class.
Common Mistakes to Avoid
Most guides fail for the same few reasons. Fix these and your classes run better.
| Mistake | Fix | Why It Matters |
|---|---|---|
| Too many steps | Cut to 8-12 steps | Beginners lose focus past twelve |
| No shape guide | Add a blocking sketch | Students need a starting point |
| Tiny fonts | Use 14pt or larger | Students read from arm's length |
| Grayscale color swatches | Print color or project the image | Swatches only work in color |
| No test run | Paint it yourself first | Catches problems before class |
Frequently Asked Questions
What are the essential components of a student painting guide?
A working guide needs five parts: a finished reference image, a simple shape or block-in guide, numbered steps with one action each, a color list with mix ratios, and a materials list. Add a short note on brush strokes for texture or blending. Keep it to one or two pages so guests can glance at it while painting. If a step needs more than two sentences, split it into two steps.
How do you format a step-by-step painting tutorial for print?
Use a clean layout with the reference image at the top and numbered steps below. Set body text at 12-point or larger, leave generous margins, and keep steps to one line each where possible. Print on 8.5 x 11 inch paper or A4, depending on your printer. Test one copy before running the full batch. If guests wear glasses or work in low light, bump the font size up a notch.
How can PaintPrompt simplify the creation of printable painting guides?
PaintPrompt generates a class-ready design from a short description, then delivers a 10-step guide, a color list, and a printable teaching plan. Instead of writing steps from scratch, you review and print. Hosts use it to plan a full month of classes in minutes and to keep a fresh design ready for every event. You can start with the free trial and see how the output fits your class format.
What visual aids should be included in a beginner painting handout?
Include a finished painting reference, a shape guide that shows how to block in the composition, and small close-ups of any tricky area like a horizon line or a tree edge. Arrows on the shape guide help guests see where each shape sits on the canvas. Keep images large enough to read from arm's length. Beginners copy what they can see, so clear visuals reduce how often you repeat instructions out loud.
Planning a full month of classes by hand takes hours you don't have. PaintPrompt generates a complete, class-ready design from a single idea, with a 10-step guide, a color list, and a printable teaching plan. It's built by real paint and sip hosts, so the compositions actually work in a live room. Get started with PaintPrompt and turn your next class into a guide your students can follow from first brush to final stroke.