How Do Absolute Beginners Paint a Landscape Step by Step?
· Editorial Team · 12 min read
Last Updated: October 29, 2026
Quick Summary
To paint a landscape step by step as an absolute beginner, choose a simple subject like a sunset or lake, gather a small set of acrylics and brushes, sketch the horizon one-third from the top or bottom, then block in large shapes before adding details. Thin layers and simple suggestions of trees make landscape painting far easier to finish.
- Choose a simple subject such as a sunset, lake with trees, mountain range, or open field.
- Six acrylic tubes cover almost every landscape color you will need.
- Place the horizon roughly one-third from the top or bottom for balance.
- Block in the sky first, then distant hills, then foreground and darker shapes.
- Work in thin layers and let them dry to avoid muddy color.
Table of Contents
- Choosing a Simple Landscape Subject for Your First Painting
- Beginner Painting Supplies and Budget-Friendly Alternatives
- Preparing the Canvas and Planning the Composition
- Mixing a Limited Palette and Blocking In the Large Shapes
- Mountain Landscape Painting for Beginners: Sky, Distant Peaks and Horizon
- Simple Landscape Painting Techniques for Trees, Water and Details
- Fixing Common Beginner Mistakes and Finishing Your Painting
- Frequently Asked Questions
Choosing a Simple Landscape Subject for Your First Painting
Pick a simple subject for your first step by step landscape painting for absolute beginners. A sunset over a flat horizon, a calm lake with a few trees, or a single mountain range all work well.
Here is a quick way to choose:
- Sunset: Big color shapes, very forgiving, and a strong first win
- Lake with trees: Teaches reflections and simple horizontal strokes
- Mountain range: Introduces layering and depth through lighter distant peaks
- Open field: Practices blending and soft texture with minimal detail
Our recommendation is a sunset or a lake. Both let you practice the core skills without getting stuck on fine detail. If you want more ideas, easy landscape painting ideas include sunsets, lakes, mountains and fields.
Beginner Painting Supplies and Budget-Friendly Alternatives
You do not need expensive gear to start, but you do need the right handful of items.
Core materials checklist
- Surface: One 8x10 in. or 9x12 in. canvas panel or stretched canvas. Panels are cheaper and stiffer, which helps beginners who press hard.
- Paints (acrylic): Titanium White, Cadmium Yellow (or Hansa Yellow), Ultramarine Blue, Alizarin Crimson, Burnt Sienna, and a small black. Six tubes cover almost every landscape color you will mix.
- Brushes: One 3/4 in. or 1 in. flat brush for skies and large shapes, one 1/2 in. flat for mid-ground, and one small round (size 2 or 4) for tree trunks and details.
- Palette: A white plastic tray, a foam plate, or a sheet of freezer paper taped to a board. White lets you judge mixed colors accurately.
- Water container: A wide-mouth jar or cup. Acrylic paint cleans up with water, so no solvents are needed.
- Paper towels or rags: For wiping brushes and controlling water on the brush.
- Palette knife (optional): A small plastic or metal knife for mixing and for adding texture to foreground grass or rocks.
- Pencil and eraser: A light 2H pencil for sketching the composition before paint goes down.
Budget-friendly substitutions
- Student-grade acrylics cost far less than professional or artist-grade paint and work fine for learning. They contain less pigment, so a color may need an extra coat to cover, but that is a minor trade-off at this stage.
- A basic brush set from a craft store is enough. Skip natural-hair brushes for now; synthetic bristles hold up well with acrylics and clean easily.
- Canvas panels instead of stretched canvas save money and are easier to store. A pack of 8x10 in. panels is a low-cost way to practice repeatedly.
- A foam plate or freezer paper works as a palette and can be thrown away, which saves cleanup time.
- Household items, a plastic cup for water, an old t-shirt cut into rags, and a cereal box lined with wax paper, can stand in for a water jar, rags, and a palette.
Acrylic paint consistency and drying basics
Acrylics dry fast, often within minutes on the canvas, which is both an advantage and a trap for beginners. Keep these rules in mind:
- Thin the first layer with a few drops of water so it spreads smoothly and covers the canvas without texture.
- Use a spray bottle to mist your palette if you are mixing a large batch and need it to stay workable longer.
- Work in thin layers rather than thick ones. Thin layers dry faster, blend more predictably, and are easier to correct.
- Let a layer dry before adding the next when you want crisp edges or when a color starts to turn muddy. Overworking wet paint is the usual cause of muddy color.
- A hair dryer on the cool setting can speed drying between layers if you are impatient, but keep it at a distance so you do not push wet paint around.
With this checklist and these substitutions, you can get started for a modest outlay and avoid the two most common beginner supply mistakes: buying too much and buying too cheaply in the wrong places.
The core supply list is short, and each item has a budget-friendly alternative worth knowing about.
| Item | Recommended | Budget alternative |
|---|---|---|
| Surface | 8x10 in. or 9x12 in. canvas panel | Pack of 8x10 in. canvas panels |
| Paints | Six acrylic tubes (titanium white, cadmium yellow, ultramarine blue, alizarin crimson, burnt sienna, black) | Student-grade acrylics |
| Brushes | 3/4 or 1 in. flat, 1/2 in. flat, small round | Basic synthetic craft-store set |
| Palette | White plastic tray | Foam plate or freezer paper |
| Water container | Wide-mouth jar or cup | Plastic cup |
| Rags | Paper towels | Old t-shirt cut into rags |
| Sketching | Light 2H pencil | Thinned paint for layout |
Preparing the Canvas and Planning the Composition
Start by thinning your first layer of paint slightly with water so it spreads smoothly. Then sketch the basic layout with a light pencil or thinned paint. Mark where the horizon sits, roughly one-third from the top or bottom. This placement gives your scene balance.
Planning the composition before you paint saves a lot of frustration. Decide where your sky, distant hills, and foreground will go.
Mixing a Limited Palette and Blocking In the Large Shapes
A limited palette keeps your colors harmonious and easy to mix. For a deeper step-by-step guide to mixing acrylic shades for beginners, follow the mixing order before you start blocking in. Try this set: Titanium White, Cadmium Yellow, Ultramarine Blue, Alizarin Crimson, and a brown or black for darkening. Most sky, water, and foliage colors come from these five.
Work in this order:
- Block in the sky with broad, horizontal strokes
- Fill the distant hills or mountains with a lighter, cooler tone
- Add the foreground and darker shapes last
Blocking in large shapes first builds a solid base. Details come later.
Mountain Landscape Painting for Beginners: Sky, Distant Peaks and Horizon
Mountains add drama, but keep the shapes simple. Paint the sky first, blending from warm tones near the horizon to cooler blues above. While the sky dries slightly, sketch the peaks with a light, cool gray-blue.
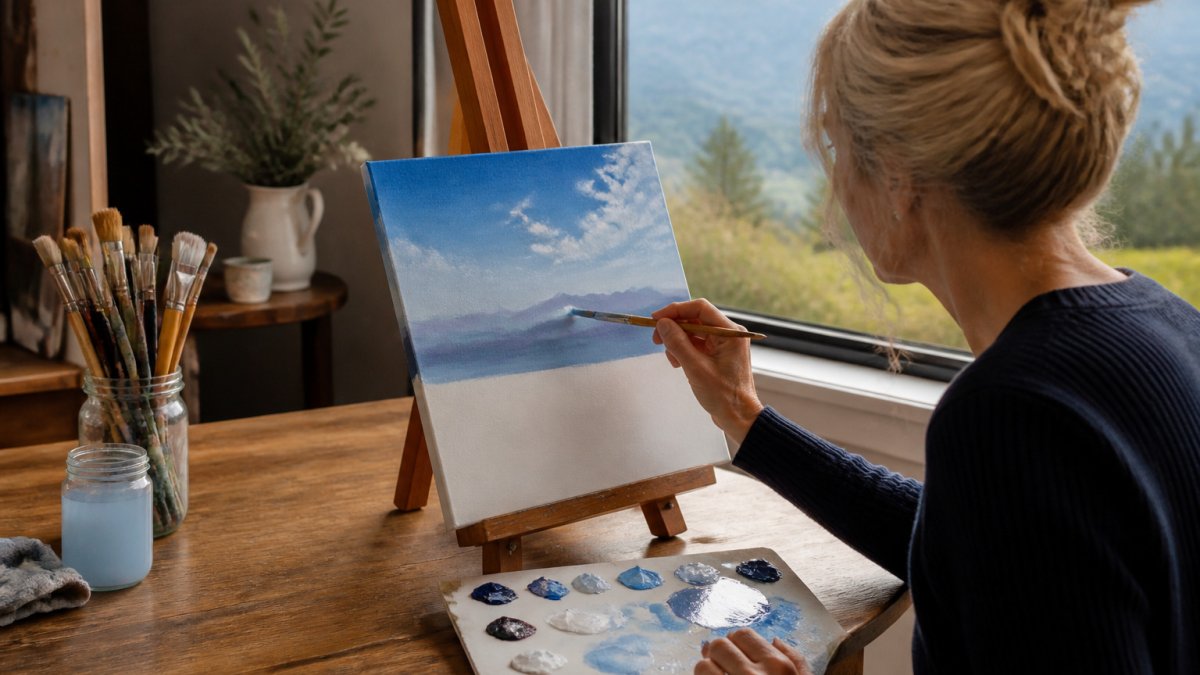
Distant peaks should look lighter and less detailed than nearby ones. This is called atmospheric perspective, and it makes the scene look deep. Follow this sunset with eight acrylic colours walkthrough for the right blending order.
Simple Landscape Painting Techniques for Trees, Water and Details
Add trees with small dabs of dark green using a round brush. Vary the sizes and angles so they look natural. Do not paint every leaf.
For water, use horizontal strokes that mirror the shapes above them. You can follow this guide to painting easy water reflections with simple brush strokes.
Finally, add highlights and small details last. A few bright strokes on the water or sunlit grass bring the painting to life.
Fixing Common Beginner Mistakes and Finishing Your Painting
Most beginner landscape problems come from a small set of causes. Here is how to diagnose and fix each one, plus how to finish the painting so it lasts.
Muddy colors
- Cause: Mixing too many colors together, or overworking wet paint on the canvas so the layers blend into a dull average.
- Fix: Limit your palette to the six tubes in the supplies section. Mix colors on the palette, not on the canvas, and stop stirring once the color is uniform. If a color turns muddy, let the area dry and glaze a fresh, cleaner color over it rather than adding more wet paint.
Flat-looking scene
- Cause: Uniform values and detail across the whole canvas, so nothing reads as near or far.
- Fix: Push contrast. Make foreground shapes darker and more saturated, and distant shapes lighter, cooler, and less detailed. This is atmospheric perspective, and it is the single most effective way to create depth. Add a few dark accents in the foreground and keep the background soft.
Unwanted brush marks
- Cause: Paint that is too thick, a brush that is too stiff for the area, or too much water on the brush.
- Fix: Thin the paint slightly and use a larger, softer brush for skies and large areas. Load the brush evenly and use long, light strokes. For smooth blends, work wet-into-wet and cross-hatch gently rather than scrubbing.
Overcrowded details
- Cause: Painting every leaf, rock, and cloud instead of suggesting them.
- Fix: Step back from the canvas every few minutes. If a detail does not read from three feet away, simplify it. A few well-placed dabs of dark green suggest a tree better than a hundred tiny leaves.
Paint that dries too fast or too slow
- Cause: Acrylics dry quickly in dry air and slowly in humid conditions. Thick paint also dries unevenly.
- Fix: Mist the palette with water, work in thin layers, and let each layer dry before adding the next when you need crisp edges. If a layer is still tacky, wait, adding wet paint over tacky paint is a common cause of muddy color.
Finishing the painting
- Let it dry fully. Acrylic feels dry within an hour but needs longer to cure through. Wait at least 24 hours before varnishing, and longer for thick areas.
- Varnish for protection. A thin coat of acrylic varnish (matte or gloss) evens out sheen and protects the surface. Apply it in a well-ventilated area and let it dry completely.
- Keep it out of direct sunlight until it is fully cured. UV light can fade some pigments over time, so display the finished piece away from harsh direct sun.
Ready to plan your first piece? PaintPrompt helps you generate a class-ready design with a 10-step guide and color list in minutes. Generate my class design and start painting your first landscape today.
Frequently Asked Questions
What is the easiest landscape to paint for a beginner?
A simple scene with a sky, one row of distant mountains, and a foreground of grass or water is the easiest starting point. It uses only a few large shapes, so you can finish in one session. Avoid detailed forests, crowds of trees or complex reflections on your first attempt. Once you can block in a horizon line and soft sky confidently, add trees and rocks in later sessions.
What supplies do beginners need to paint a landscape?
Start with a small canvas or canvas panel, a few acrylic tubes including Titanium White, a basic palette of three to five colors, one flat brush about one inch wide, a small round brush for details, and a palette for mixing. A fan brush and a palette knife help with texture. Inexpensive student-grade paints and a basic brush set work well for a first painting, and you can upgrade once you know which tools you use most.
How long does it take to paint a simple landscape?
Most beginners finish a simple acrylic landscape in two to three hours, including setup and mixing. Acrylic dries quickly, so you can layer the sky, mountains and foreground in one sitting. Allow extra time for the first layer of each area to dry before adding details. Working on a mini canvas keeps the session short and manageable.
Should you paint the sky or the land first?
Block in the sky first, then the distant mountains, then the foreground. Working from back to front lets each layer sit on top of the one behind it and makes depth easier to build. Let the sky dry lightly before adding mountains so the edges stay clean, and blend the foreground colors into the background last.
