Painting Curriculum for Small Studios: A 2026 Guide
· Editorial Team · 11 min read
Table of Contents
- Why a Painting Curriculum Beats Improvising in a Small Studio
- Easy Painting Ideas for Beginners That Work in Tight Spaces
- How to Write a Beginner Painting Lesson Plan, Step by Step
- Your Painting Class Supply List for a Compact Workspace
- Painting Class Duration: Pacing a Session Without Dead Time
- Studio Layout and Organization: Making Every Tabletop Inch Count
- Adapting Your Painting Curriculum for Mixed-Age and Mixed-Skill Groups
- Frequently Asked Questions
Last Updated: October 15, 2026
Why a Painting Curriculum Beats Improvising in a Small Studio
A painting curriculum is a structured sequence of lessons that builds specific skills in a defined order, and in a studio under 200 square feet it is the single biggest factor in whether a class runs smoothly or collapses into chaos.
The problem is not talent. It is that a compact room punishes improvisation in ways a large one does not.
What Changes When Your Studio Is 200 Square Feet or Less
Space constraints change four things at once: how many supplies you can pre-stage, how far guests can move, how much wet canvas can sit out to dry, and how loudly instruction carries across the room. A curriculum that assumes a dedicated sink, drying racks, and individual easels will fail here.
What works instead is a curriculum built around a single shared focal point, minimal tool switching, and projects that fit on a tabletop. The National Art Education Association's guidance on studio learning environments makes the broader case that physical setup shapes what students can actually learn, and that principle gets sharper as the room shrinks.
Easy Painting Ideas for Beginners That Work in Tight Spaces
The best beginner projects for a compact studio share three traits: they use two or three colors, they can be blocked in within ten minutes, and they look finished even if the guest stops early. Sunset gradients, single-bloom florals, simple landscapes with a horizon line, and abstract color-block pieces all fit that description.
Avoid anything with fine detail work or multiple drying stages. Portrait painting and layered watercolor foundations are wonderful skills, but they demand more tabletop space and more drying time than a small room can offer in a single session.
If you want a deeper bank of starter projects, our guide to easy painting ideas for beginners walks through themes that consistently work for first-timers.
How to Write a Beginner Painting Lesson Plan, Step by Step
A beginner painting lesson plan is a written sequence that tells the instructor what to demonstrate, when to demonstrate it, and what the guest should have on canvas at each checkpoint. Here is the process we use:
- Pick the finished image and work backward from it
- Identify the three to five shapes that form the composition
- Assign a color to each shape and write the mixing ratio
- Break the painting into ten steps, not twenty
- Write one sentence of instruction per step
- Note the expected canvas state after each step
- Test the timing against your actual class length
Numbering Your Steps: Why 10 Beats 20
Ten steps is the ceiling for a beginner session. Twenty steps sounds thorough on paper, but it means constant stopping, and constant stopping kills momentum. Guests lose their place, the instructor repeats themselves, and the room gets loud.
Ten steps also makes your printable teaching plan readable at a glance. That matters when you are managing four people at once with paint on your hands.
Your Painting Class Supply List for a Compact Workspace
A painting class supply list for a small room should be shorter than you think. Every extra item is another thing competing for tabletop space. The core list:
- Acrylic paint in six colors plus white
- Two flat brushes and one round brush per guest
- Pre-cut canvas panels rather than stretched canvas
- Paper plates or small trays for palettes
- One shared water container per two guests
- Paper towels and a lined trash bag
- Aprons or old shirts
Canvas panels stack flat and take up a fraction of the room that stretched canvas does. That single swap often frees up enough space for a fourth guest.
Painting Class Duration: Pacing a Session Without Dead Time
Painting class duration for beginners should land between 90 minutes and two hours, with roughly 60 percent of that spent with a brush in hand. The rest is setup, demonstration, and the drying pauses you cannot avoid.
The most common pacing mistake is front-loading instruction. A 25-minute opening demo feels productive to the instructor and feels like a lecture to the guest. Break the demo into three short bursts instead, delivered right before the guest needs each technique.
| Class Length | Demo Time | Hands-On Time | Best For |
|---|---|---|---|
| 60 minutes | 10 min | 45 min | Simple single-subject pieces |
| 90 minutes | 15 min | 70 min | Standard beginner class |
| 2 hours | 20 min | 95 min | Landscape or gradient work |
| 3 hours | 25 min | 150 min | Multi-stage or paired projects |
Studio Layout and Organization: Making Every Tabletop Inch Count
Small studio organization comes down to vertical storage and a clear traffic path. Put supplies on a rolling cart you can park out of the way during instruction, keep drying paintings on a wall-mounted rack or a shelf above head height, and leave one open lane so guests can reach the water without climbing over each other.
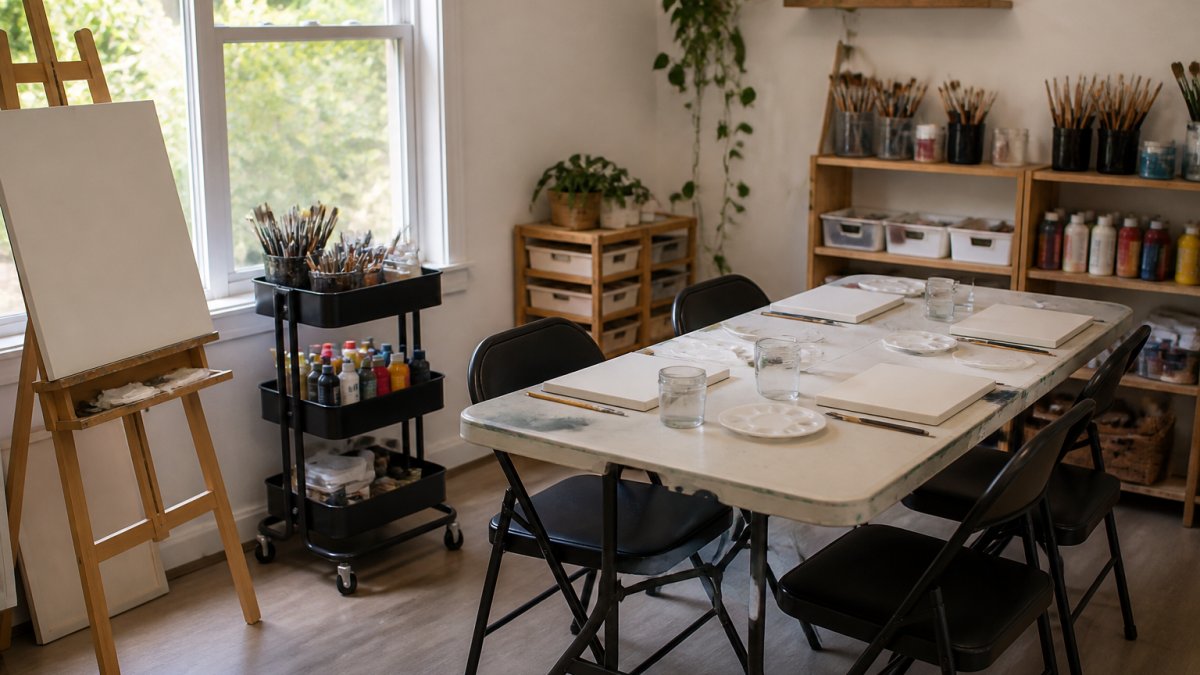
Repurposing furniture is the cheapest upgrade available. A dresser becomes paint storage. A bookshelf laid on its side becomes a drying rack. An ironing board, which is narrow and height-adjustable, makes an excellent secondary work surface for the instructor's demo.
Lighting deserves more attention than it usually gets. Position the table so natural light falls across the canvas rather than behind it, and add a clamp lamp with a daylight bulb for evening sessions. Guests who cannot see their own color mixing will produce muddy results and blame themselves.
Adapting Your Painting Curriculum for Mixed-Age and Mixed-Skill Groups
Mixed-age and mixed-skill groups are the norm in paint and sip, not the exception, and most curriculum guides ignore this entirely. The gap is real: a single room may hold a 7-year-old, a teenager, and three adults, all working from the same reference image. The curriculum has to absorb that without splitting the instructor's attention into fragments.
The fix is a tiered step structure built on a single spine. Every guest completes the same ten steps in the same order, but each step has a simpler version and a more advanced version. For a landscape, the simpler version of the tree step is a single green shape. The advanced version adds a highlight and a shadow. Same step number, same timing, different ceiling.
Age bands change the tier, not the lesson. A practical mapping:
- Ages 6-9: simpler tier, with pre-mixed colors and a larger brush. Expect 60-75 minutes of focused work before attention drifts.
- Ages 10-13: simpler tier with one advanced option per step. They can handle a two-color mix if you demonstrate it.
- Ages 14-adult beginners: standard tier, full ten steps.
- Returning or experienced adults: advanced tier, with optional texture and blending additions layered onto the same steps.
This is where a structured curriculum pays off most. When you are managing a group where one guest has painted for years and another has never held a brush, you do not have mental bandwidth to invent variations on the spot. Having them written down in advance is the difference between a calm class and a stressful one.
Room management for mixed groups follows from the tiering. Seat the advanced painters nearest the supply station so they can self-serve refills without interrupting your demo. Seat the youngest or least experienced guests closest to your demo easel, where they can see your brush angle without leaning. If you have a helper, assign them to the simpler tier, they can repeat your demo at a slower pace while you move through the room.
A common pattern in small studios is to run a single 90-minute session for all ages. That works if the simpler tier has a natural stopping point at step seven or eight. Design your lesson so the painting looks finished at that point, and let the advanced tier continue to step ten. Nobody feels behind, and nobody waits.
That is the problem PaintPrompt was built to solve. Describe the painting you want to teach, and you get a class-ready design with a 10-step guide, a color list, and a printable teaching plan you can hand to every guest. Hosts use it to plan a full month of classes in minutes, and the step structure is designed so beginners actually finish. You can generate my class design and see the format before committing to anything.
Frequently Asked Questions
How do you create a painting curriculum for beginners?
Start with one finished painting per session and work backward. Pick a simple subject (a sunset, a single bloom, a landscape horizon), break it into 8-12 numbered steps, and list every color and brush needed. Run it once with a small group, note where people stall, and adjust the step count. A painting curriculum for small studios should be repeatable: same structure, different subject each week.
How long should a beginner painting workshop last?
Plan for 90 minutes to 2 hours for a single 11x14 canvas. Setup takes 10-15 minutes, instruction and painting fill 60-80 minutes, and drying plus cleanup needs another 15. If your painting class duration runs longer than 2 hours, beginners lose focus and the room gets cramped. Split complex paintings into two sessions rather than stretching one.
What painting supplies do you need for a small studio class?
A basic painting class supply list covers acrylic paint in six to eight colors, three brush sizes per person, 11x14 canvases, paper plates or palettes, water cups, paper towels, and table covers. In a small studio, add a rolling cart for shared supplies and stackable drying racks. Buy brushes in bulk packs and keep spares; beginners are hard on them.
How can you teach painting when studio space is limited?
Work vertically where you can. Easels take less floor space than flat tables, and wall-mounted drying racks free up every surface. Keep one rolling cart per two students so supplies travel instead of spreading. Set your class cap based on tabletop space, not room size: roughly 60 cm of table width per person is the practical minimum for painting.
How do you adapt a painting curriculum for students with different skill levels?
Teach one painting with two layers of guidance. Everyone follows the same numbered steps, but offer an optional detail pass for faster painters: extra highlights, a second color blend, or a foreground element. Pair beginners with a printed step guide so they can self-check while you help advanced students. This keeps a mixed group on one timeline.
What should a beginner painting class teach first?
Blocking in shapes, not detail. Show students how to sketch the main masses lightly, then fill them with flat color before any blending. This single habit prevents the most common beginner problem: a muddy canvas from overworking wet paint. Once blocking feels natural, move to color mixing and edge control in later sessions.