Step by Step Painting Lesson Plans for Art Classes
· Editorial Team · 14 min read
Table of Contents
- Why Step by Step Painting Lesson Plans Work Better Than Improvising
- Easy Painting Ideas for Beginners That Fill a Full Class Period
- The Acrylic Painting Lesson Plan Template Every Instructor Needs
- How to Teach a Paint and Sip Class with a 10-Step Framework
- Your Painting Class Preparation Checklist Before Every Session
- Differentiation, Accessibility, and Budget-Friendly Alternatives
- Frequently Asked Questions
Last Updated: September 11, 2026
Why Step by Step Painting Lesson Plans Work Better Than Improvising
A painting lesson plan is a written sequence that tells an instructor what to teach, in what order, and how to check that students actually finish a canvas. Improvising feels creative in the moment, but it usually collapses somewhere around the thirty-minute mark, when half the room is ahead and half is still blocking in the background.
This guide breaks down the full system: materials setup, a reusable acrylic template, a 10-step framework for paint and sip events, and the rubrics and checklists that keep a class on schedule.
The stakes are simple. A structured plan means every guest leaves with a finished painting. A loose one means you spend the last twenty minutes rescuing three canvases while the rest of the room waits.
Easy Painting Ideas for Beginners That Fill a Full Class Period
The best beginner subjects share three traits: a large simple shape, a limited color palette, and a clear horizon or focal point. Sunset over water, a single tree on a hill, and a mountain range with a reflective lake all work because students can see progress within the first ten minutes.
Avoid anything with faces, detailed animals, or complex perspective. Those eat time and produce frustration.
A reliable rotation for a recurring studio schedule:
- Sunset with silhouetted palm or pine
- Abstract color-block landscape
- Single flower in a vase
- Moonlit mountain lake
- Beach with a simple umbrella and chair
Each of these can be blocked in with three or four flat shapes, which is exactly what makes them teachable to a room of first-timers.
The Acrylic Painting Lesson Plan Template Every Instructor Needs
An acrylic painting lesson plan template is a one-page document covering materials, canvas preparation, color mixing, the painting sequence, and a time estimate per stage. Build it once and reuse it for every class with only the subject swapped out.
For a two-hour session, the standard split is roughly 15 minutes setup, 20 minutes demonstration, 70 minutes guided painting, and 15 minutes for critique and cleanup.
Materials, Setup, and Canvas Preparation
Acrylic dries fast, which is why it dominates paint and sip formats (tate.org.uk). A workable supply list per student:
- One stretched canvas, pre-primed with gesso if the surface is absorbent
- Synthetic brushes in three sizes: a 1-inch flat, a medium round, and a small detail brush
- A basic color palette: titanium white, cadmium yellow, cadmium red, ultramarine blue, and black
- A palette knife, a water cup, an apron, and paper towels
- A table easel or a stack of books to angle the canvas
Prepare canvases before guests arrive. A thin coat of gesso gives the paint something to grip and prevents the first layer from soaking straight into the fabric. Set up one station per person with everything within arm's reach so nobody has to get up mid-stroke.
Color Mixing and Value Planning for Beginners
Teach value before color. A value study is a quick sketch showing only light, medium, and dark areas of the composition, and it prevents the muddy, flat results that ruin beginner paintings.
Give students three mixing rules they can apply immediately:
- Mix the sky color first. It covers the largest area and sets the tone.
- Never mix more than two colors at once unless you want gray.
- Test every mix on a scrap of canvas before applying it to the painting.
Opacity and transparency matter here. Titanium white is opaque and hides what's underneath; ultramarine is transparent and lets earlier layers show through. Knowing which is which stops students from overworking an area until it turns to mud.
How to Teach a Paint and Sip Class with a 10-Step Framework
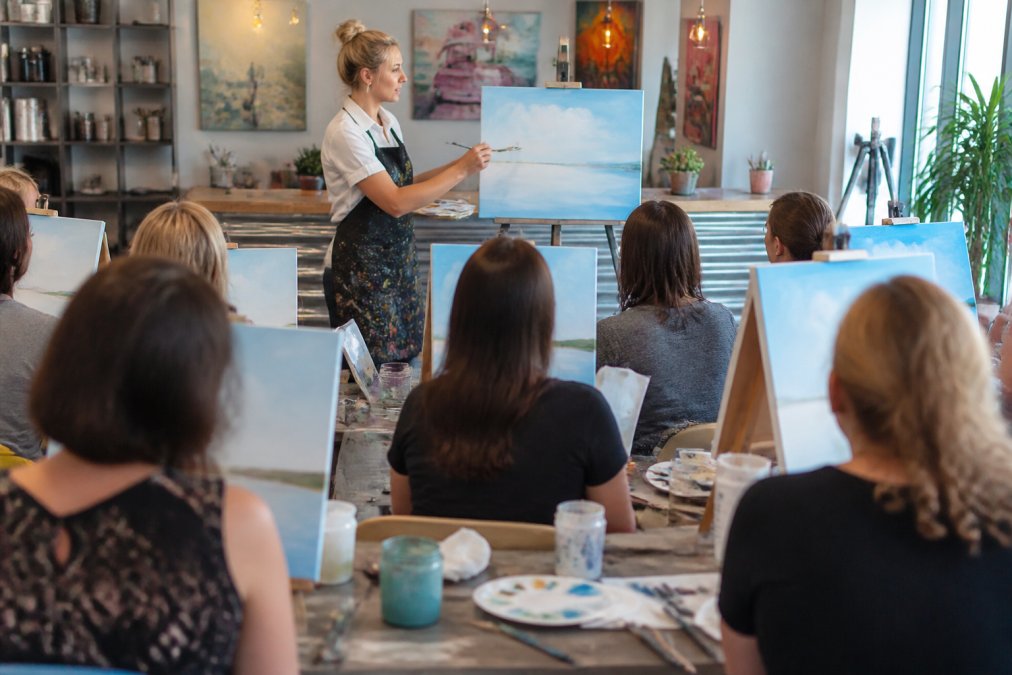
A paint and sip class runs on a fixed 10-step sequence that moves from blank canvas to finished painting in about two hours. The framework below works for any subject because it separates blocking, layering, and detail into distinct stages.
- Sketch the compositional layout in light pencil or thinned paint.
- Block in the sky with the lightest color.
- Add the mid-tone background shapes.
- Paint the darkest silhouette layer.
- Establish the horizon line.
- Add the main focal shape.
- Layer mid-tones over the base colors.
- Refine edges with the small detail brush.
- Add highlights last, never first.
- Sign and step back for the group critique.
The whole sequence depends on one rule: dark over light, thin over thick. Students who paint highlights early end up repainting the whole canvas.
Demonstration, Guided Practice, and Independent Work
The three-phase structure is what separates a class that finishes together from one that fragments. Scaffolded instruction means the instructor demonstrates a step, the class copies it while the instructor circulates, then students repeat the move on their own.
Keep the demonstration short. A three-minute demo beats a ten-minute lecture every time, because attention drops fast when hands are idle (apa.org). During guided practice, walk the room and correct brush angle and pigment load rather than composition. Let independent work cover the final details, where small mistakes read as personal style.
Assessment and Grading Rubrics for Painting Classes
Most paint and sip events don't grade anyone, but school programs and multi-week courses do. A simple four-category rubric covers it:
| Category | What to Look For | Weight |
|---|---|---|
| Composition | Focal point placed, layout balanced | 25% |
| Color mixing | Clean mixes, intentional value range | 25% |
| Technique | Brush control, layering, edge quality | 25% |
| Completion | Canvas finished to a presentable state | 25% |
Score each category on a 1-4 scale. The rubric works for any subject because it measures process, not whether the student painted the "right" sunset.
Your Painting Class Preparation Checklist Before Every Session
A painting class preparation checklist is the difference between a calm setup and a frantic one. Run through it the day before and again thirty minutes before doors open.
- Canvases gessoed and dried
- Paint portioned into cups or palettes
- Brushes sorted by size at each station
- Water cups filled, paper towels stocked
- Aprons laid out
- Reference image printed or projected
- Printed step guide at every seat
- Backup supplies for latecomers
Differentiation, Accessibility, and Budget-Friendly Alternatives
Most step by step painting lesson plans are written for one imaginary student who paints at average speed with average fine-motor control and an average budget. Real classrooms don't work that way. The three variables that break a lesson plan fastest are skill spread, physical access needs, and money, and each one has a concrete fix.
Differentiating by Grade Band and Skill Level
A single painting plan can serve K-5, middle school, high school, and adult hobbyists, but the scaffolding has to change at each level. The subject can stay the same; the amount of pre-done work changes.
| Grade band | Session length | Canvas size | Pre-done for the student | What they do independently |
|---|---|---|---|---|
| K-2 | 30-40 min | 8x10 in | Pencil outline, sky pre-blocked | Fill large shapes, add one detail |
| 3-5 | 45-60 min | 9x12 in | Pencil outline only | Block in sky and ground, mix two colors |
| 6-8 | 60-75 min | 11x14 in | Nothing | Full sequence with instructor pacing |
| 9-12 | 90 min | 12x16 in | Nothing | Full sequence plus independent color choices |
| Adult hobbyist | 2-3 hrs | 16x20 in | Nothing | Full sequence plus critique |
A common pattern in mixed-ability rooms is to run one subject at two difficulty tiers. Tier A students get a pre-sketched canvas and a three-color palette. Tier B students get a blank canvas and a five-color palette with a value study requirement. Both finish at the same time because Tier A has fewer decisions to make.
For faster students, keep a "stretch task" ready: add a reflection in the water, add a second tree, or introduce a warm highlight on the focal shape. For slower students, reduce the canvas size rather than rushing the steps, a finished 8x10 beats an unfinished 16x20 every time.
Adaptive Techniques for Students with Physical or Sensory Needs
Adaptive painting is the largest gap in current lesson-plan content, and it is also the easiest to solve with standard art-room tools.
- Grip and motor support: foam pencil grips, built-up brush handles, and wrist weights for tremor control. A brush taped to a dowel extends reach for students with limited shoulder mobility.
- Seated and wheelchair access: a table easel set at 20-30 degrees beats a vertical floor easel for anyone painting from a seated position. Adjust table height so the student's forearm rests on the surface.
- Low-vision adaptations: high-contrast reference images, matte canvas instead of glossy, and a bold black outline on the printed step guide. A dark mat under a light canvas reduces glare.
- Sensory sensitivities: unscented acrylics, nitrile gloves for students who dislike paint on skin, and a quiet corner station for students who need reduced stimulation. Offer a smock instead of an apron if ties are a trigger.
- Cognitive and processing support: a picture-only step card (no text) at each station, plus a verbal cue every 60-90 seconds. Chunk the 10-step framework into three named phases, block, build, finish, so students always know which phase they are in.
Document these adaptations in the lesson plan itself, not as an afterthought. When a substitute instructor picks up the plan, the accommodations should be on page one.
Budget-Friendly Alternatives That Don't Hurt Results
A full class of stretched canvas and artist-grade acrylics adds up fast. The substitutions below cut cost without changing what students learn.
- Canvas boards instead of stretched canvas. Rigid, cheaper per unit, and they don't flex under a brush, often better for beginners.
- Student-grade acrylics in bulk. Buy 16 oz or larger bottles of the five core colors (titanium white, cadmium yellow, cadmium red, ultramarine blue, black) and portion into cups. Student-grade pigment is less concentrated, so teach students to load the brush more heavily.
- Shared palettes. One palette per two students halves the paint volume and forces the color-mixing conversation that beginners need anyway.
- Paper and cardstock for practice. Run the value study on cardstock, not canvas. Save the canvas for the final piece.
- Reusable water cups and cloth rags. Paper towels are the hidden recurring cost; cut-up cotton t-shirts work better and cost nothing.
- Buy in bulk per semester. Planning a full month or semester of classes in advance lets you buy the five core colors in large containers and stretch them across every session.
A practical rule: if a supply substitution changes what the student learns, don't make it. If it only changes the surface they learn it on, make it.
Frequently Asked Questions
What are the essential components of a successful painting lesson plan?
A strong painting lesson plan includes a clear objective, a materials list, a step-by-step sequence from underpainting to final details, color mixing guidance, and time allocations for each phase. It should also include a demonstration segment, guided practice, and independent work time. Adding a simple assessment rubric helps you track student progress and keeps the class focused on a finished painting.
How do you structure a step-by-step painting class for beginners?
Start with a brief overview of the finished painting so students know the goal. Move into canvas preparation and a value study, then demonstrate each layer: background, midground, and foreground. Use wet-on-wet for blending and glazing for depth. End with details and a short critique. Keeping each step to 5-10 minutes prevents students from falling behind and keeps the class on schedule.
What are some easy painting ideas for beginners to include in lesson plans?
Sunset landscapes, simple seascapes, abstract florals, and single-object still lifes work well because they rely on large shapes and limited color palettes. These subjects let beginners practice color mixing, blending techniques, and layering without getting lost in fine detail. Choose compositions with a clear focal point and no more than five or six colors to keep the class moving.
How can I save time when creating acrylic painting lesson plans?
Use a repeatable template that covers materials, color palette, step sequence, and timing. Pre-mix your color list and print a visual guide for each guest. Tools that generate class-ready designs with a built-in 10-step guide and printable teaching plan can cut preparation from hours to minutes. PaintPrompt offers a free trial.
What teaching techniques work best for acrylic painting workshops?
Demonstration followed by guided practice is the most effective approach. Show one step, let students complete it, then move to the next. Use a large easel or projected canvas so everyone can see. Circulate during independent work to correct brush technique and color mixing. Keep the pace steady and build in short breaks for clean-up and palette reset.
How do you manage time effectively during a painting lesson?
Assign a fixed number of minutes to each phase: 10 for setup and color mixing, 20 for underpainting, 30 for layering, 15 for details, and 10 for clean-up. Use a visible timer so students stay aware of the pace. Pre-mix base colors and have water cups and paper towels ready before class starts. This structure keeps the session on track and ensures everyone finishes.
Running a class without a written plan works once. Running it every week without one burns you out by the third month. PaintPrompt gives you instantly generated class-ready designs, a 10-step instruction set, a color list, and a printable teaching guide you can hand to every guest. Get started with PaintPrompt and plan your next month of classes in minutes.