7 Steps to Teach Painting Without a Formal Degree
· Editorial Team · 12 min read
Last Updated: November 7, 2026
Quick Summary
You do not need a degree to teach painting, because most instruction happens in studios, community centers, and private events where no formal credential is required. To teach painting well, build foundational skills first, use beginner lesson plan templates, and structure workshops with clear timed stages.
- Practice drawing, color theory, and composition before you charge anyone for a class.
- A beginner lesson plan should list the reference image, numbered steps, colors, and time per stage.
- Break a two-hour workshop into welcome, demonstration, guided painting, finishing, and cleanup blocks.
- Credential rules depend on the setting, so confirm requirements with each venue before advertising.
- Price by the seat by dividing materials, venue, your time, and profit by expected seats.
Table of Contents
- Do You Need a Degree to Teach Painting?
- Step 1: Build Your Own Foundational Skills First
- Step 2: Use Painting Lesson Plan Templates for Beginners
- Step 3: Learn How to Structure a Painting Workshop
- Step 4: Build Credibility Without a Diploma
- Step 5: Know the Credential Rules for Each Teaching Setting
- Step 6: Learn How to Price Painting Workshops
- Step 7: Find Students and Fill Your First Classes
- Frequently Asked Questions
Do You Need a Degree to Teach Painting?
No, you do not need a degree to teach painting. Most painting instruction happens in studios, community centers, and private events where no formal credential is required.
Plenty of working instructors never set foot in art school. Many learned by painting, teaching small groups, and refining their approach.
But there is a real gap between "you can teach" and "you can teach well." A degree does not close that gap.
What Art Schools Teach That You Can Learn on Your Own
Art school bundles four things: foundational skills, critique, art history, and time to experiment. You can build three of those without a classroom.
- Foundational skills: drawing, color mixing, value, and composition. All learnable from practice.
- Critique: replace it with feedback from peers, local art groups, or online communities.
- Art history and theory: free through museums, library books, and reputable art resources.
The one thing a school gives you that is harder to copy is deadlines. So build your own. Set a weekly painting goal and stick to it.
Step 1: Build Your Own Foundational Skills First
You cannot teach what you have not practiced. Before you charge anyone for a class, spend real time at the easel. Aim for consistent practice, not occasional bursts.
A common mistake is jumping straight to finished paintings. Slow down and drill the basics. That is what makes your demonstrations look effortless later.
Drawing, Color Theory, and Composition Practice
Three skills carry most of a beginner painting class. Get comfortable with each before you teach it.
- Drawing: practice blocking in simple shapes and proportions. Ten minutes a day beats one long session a week.
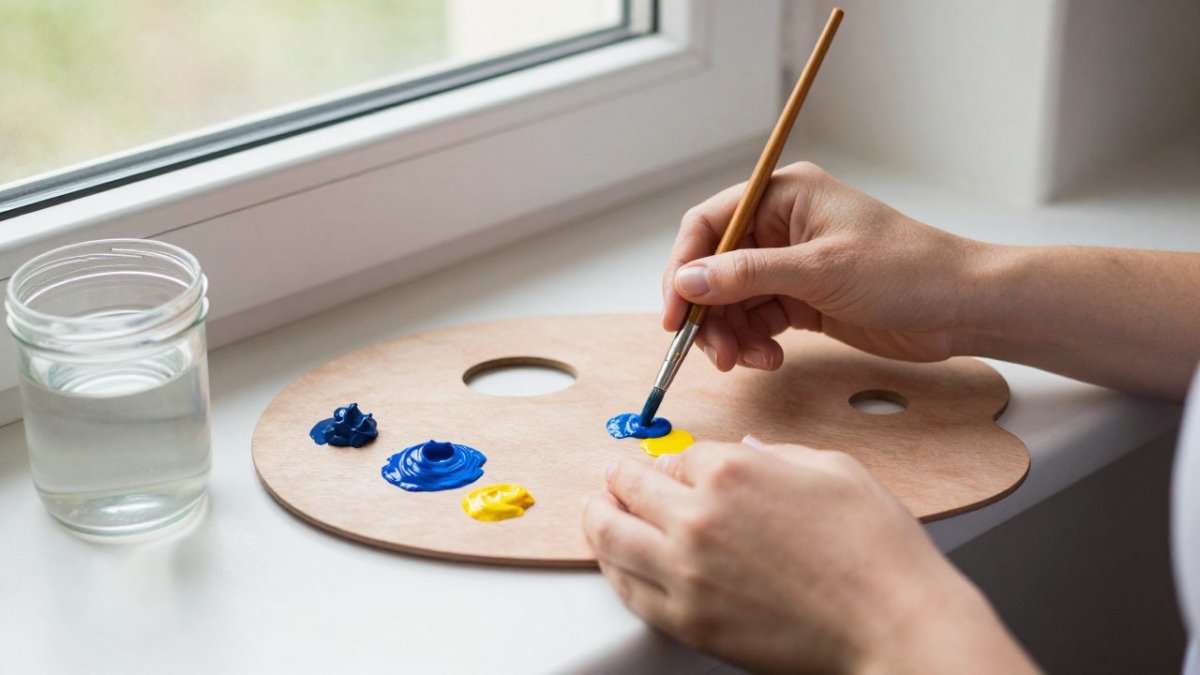
- Color theory: learn how to mix clean secondary colors and avoid muddy results. This is the skill students ask about most.
- Composition: study how to place a focal point and balance a canvas. A strong layout makes a simple painting look polished.
If color mixing still feels shaky, start with a focused guide on mixing acrylic paint colors for beginners. It walks through the exact mixes you will demonstrate in class.
Step 2: Use Painting Lesson Plan Templates for Beginners
A lesson plan turns a vague idea into a class you can actually run. For beginners, the plan should spell out the finished image, the order of steps, the colors needed, and how long each stage takes.
This is where most new instructors lose time. They plan in their head, then improvise in front of paying guests. It shows.
Use painting lesson plan templates for beginners that include:
- A reference image students can see
- A numbered sequence of steps
- A short color list
PaintPrompt generates this kind of plan. For a fuller walkthrough, see our guide to step by step painting lesson plans for art classes.
Step 3: Learn How to Structure a Painting Workshop
A workshop has a rhythm: settle in, demonstrate, paint, finish, clean up. Break a two-hour session into clear blocks and beginners stay calm instead of panicking.
Here is a simple structure that works for most beginner classes:
| Stage | Time | What Happens |
|---|---|---|
| Welcome and setup | 10 min | Guests settle, aprons on, materials out |
| Demonstration | 15 min | You paint the first stage live |
| Guided painting | 60 min | Students follow along, you circulate |
| Finishing touches | 20 min | Details, signatures, photos |
| Cleanup and wrap | 15 min | Supplies collected, paintings dry |
Time
Timing, Demonstration, and Student Engagement
Keep demonstrations short and repeatable. Show one stage, let students paint it, then move on. Long demos lose the room.
Engagement comes from small moves:
- Walk the room and coach individuals by name
- Praise specific choices, not just "good job"
- Offer a simpler version of any step that trips people up
For a deeper look at running sessions smoothly, read how to teach painting workshops effectively.
Step 4: Build Credibility Without a Diploma
Credibility comes from proof, not paperwork. Beginners care about one thing: will they leave with a painting they like? Show them that answer before they book.
Build a simple portfolio of finished paintings and photos of past classes. Post short video lessons or clips of you painting. A phone recording is enough.
A portfolio of student work can be persuasive for nervous beginners.
Step 5: Know the Credential Rules for Each Teaching Setting
Credential rules depend on where you teach, not on the subject. A private studio or a paint-and-sip event rarely requires a degree. Public school teaching and some community programs do. The practical move is to sort your options by how much oversight each setting carries, then confirm the specifics with the venue before you advertise.
Here is how the settings usually break down:
- Private studios and events: usually no formal credential required. Venues often rely on insurance and an instructor's portfolio.
- Public schools: teaching licensure is typically required for classroom positions. Requirements are set at the state level, so the rules in one state do not transfer automatically to another.
- Community centers and libraries: requirements vary by program and by funding source. A city parks-and-recreation department may run a background check and ask for references; a library may only ask for a proposal.
What Actually Triggers a Credential Requirement
Most of the time, the trigger is not the word "teacher", it is one of three things: public funding, credit or a transcript, or service to minors in a licensed facility. If your class is a paid enrichment activity with no public money and no academic credit, you are usually in the clear. If a school district is paying you through a grant, or a student expects a transcript, expect a licensure or approval process.
Watch out: advertising yourself as a "certified" or "licensed" instructor when you hold no such credential can create liability and consumer-protection problems, so describe your experience accurately. Describing your experience accurately also means letting your teaching reflect what you genuinely know and value as an artist, rather than adopting credentials or a persona you do not have, as you curate a personal art style.
How to Verify Before You Commit
Confirm the rules for your specific setting before you print a flyer:
- Ask the venue what documentation it requires from instructors, insurance, background check, references, or a sample lesson.
- If the setting is a public school, check the state education agency's licensure page for art endorsements and alternative pathways.
- For community programs, ask whether the position is classified as a contractor or an employee, since that changes your tax and insurance obligations.
- Keep a one-page record of what each venue asked for, so you can reuse it when you approach the next one.
Rules vary by state and by program, so confirm before you commit to a class. When in doubt, ask the venue directly.
Step 6: Learn How to Price Painting Workshops
Price by the seat, then work backward to your costs. Add up materials, venue, your time, and a margin. Divide by the number of seats to find your ticket price.
A simple formula:
Ticket price = (materials + venue + your time + target profit) ÷ seats
If a class costs $150 in total to run and you fill 10 seats, your floor is $15 per seat before profit. Most instructors price above the floor to cover no-shows and setup time.
Build the Cost Side First
List every cost before you set a ticket price. The categories that catch people out:
- Canvas and paint: a beginner acrylic class typically uses one canvas per student plus shared paint. Price your canvas and paint per seat, not per class, so a half-full room does not sink you.
- Brushes and consumables: brushes, water cups, palettes, paper towels, and aprons. Brushes wear out, so budget a replacement allowance per session.
- Venue: some spaces charge a flat room fee, some take a percentage of ticket sales, and some are free in exchange for bringing a crowd. Ask which model applies before you set the price.
Set the Ticket Price With a Margin for No-Shows
Divide total cost by the number of seats you expect to fill, not the number you hope to fill. Then add a margin. Many instructors price above their per-seat cost to leave room for empty chairs, comped seats, and the occasional refund.
Watch out: pricing at cost to "fill the room" leaves no cushion, and one no-show can turn a profitable class into a loss.
Estimate Income Before You Book the Venue
Work the formula forward to see what a class can realistically earn. If your ticket is $45 and you fill 10 seats, gross revenue is $450. Subtract materials, venue, and insurance, and the remainder is what you pay yourself for the teaching and setup hours.
For a full breakdown of per-seat costs and profitable pricing, see how to price your paint and sip workshop for profit.
Step 7: Find Students and Fill Your First Classes
Your first students come from your own circle, not from ads. Start with people who already know you, then let them bring friends.
Try these channels first:
- Host a discounted first class for friends and family
- Partner with a local café, bar, or community space
- Post class photos and dates on social media
- Offer private bookings for birthdays and team events
Corporate team-building can be a useful market. Those groups often need easy-to-follow guides that work for total beginners, which is what PaintPrompt is designed to help with.
Teaching painting without a degree comes down to practice, planning, and proof. If lesson prep is eating your time, PaintPrompt can help.
Frequently Asked Questions
Do you need a teaching license to host private painting workshops?
For private workshops, paint and sip events, and adult enrichment classes, you generally do not need a state teaching license. Licensing requirements apply mainly to K-12 public school positions. Private studios, community centers, and corporate events typically hire instructors based on portfolio, teaching samples, and experience. Check your state's education board rules if you plan to teach minors in a school-affiliated program, since those settings can carry different requirements.
How do you structure a painting lesson for beginners?
A beginner lesson works best in four phases: a short demo of the full painting, a guided block-in where students sketch the main shapes, step-by-step painting with pause points for each student to catch up, and a final detail pass. Keep the whole session to about two hours. Build in a 10-step sequence so nobody feels lost, and print a shape guide so students can see how to block the picture in before touching paint.
What supplies do you need to start teaching painting classes?
Start with student-grade acrylics in a core palette, canvas panels or stretched canvases in one size, a set of flat and round brushes per station, disposable plates or palettes, water cups, paper towels, and aprons. Add table covers and a drying rack. Buy in bulk to keep per-seat costs down, and test every material yourself before a class so you know how it behaves for beginners.
How can you build credibility as a self-taught painting instructor?
Document your work and your classes. A portfolio of finished paintings, photos of students holding completed canvases, and short video clips of your demonstrations do more than a diploma in most private settings. Collect testimonials after each session and post them where prospective students can see them. Offering a free or low-cost demo class is one of the fastest ways to prove you can teach, not just paint.
