How to Teach Painting Workshops Effectively: A 2026 Guide
· Editorial Team · 15 min read
Table of Contents
- Start With a Painting Workshop Lesson Plan That Fits the Clock
- How Long Should an Art Workshop Be?
- Beginner Painting Class Ideas That Actually Finish
- Build a Painting Class Supplies List and Budget
- How to Teach Painting Workshops With Clear Demonstrations
- Set Class Size, Staffing, and Room Setup Before You Teach
- Measure Outcomes and Turn Students Into Repeat Guests
- Frequently Asked Questions
Last Updated: October 20, 2026
Start With a Painting Workshop Lesson Plan That Fits the Clock
Most new instructors build a workshop backward. They pick a pretty image, then hope the clock cooperates. It rarely does.
A painting workshop lesson plan is a timed sequence of teaching moves, not a list of art supplies.
Here is how we would structure it at PaintPrompt, where our job is turning an idea into a class-ready design with a printable teaching plan.
A Sample 2-Hour Lesson Plan, Step by Step
| Time | Block | What You Do |
|---|---|---|
| 0-15 min | Welcome and setup | Aprons on, stations checked, palette loaded |
| 15-30 min | Full demonstration | Paint the entire piece start to finish, no pauses |
| 30-45 min | Blocking in | Guide students through the big shapes only |
| 45-80 min | Guided painting | One step, then walk the room, then the next step |
| 80-100 min | Details and fixes | Add highlights, correct muddy areas |
| 100-115 min | Finishing and photos | Signatures, group photo, paintings on the floor |
| 115-120 min | Wrap-up | Supplies collected, next class mentioned |
The demonstration-first order surprises people. Showing the finished process before anyone lifts a brush gives beginners a mental map, so they stop asking "what comes next" every few minutes.
How Long Should an Art Workshop Be?
Two hours is the sweet spot for a beginner painting workshop. It is long enough to finish a real canvas and short enough that attention, babysitters, and bar tabs survive it.
The honest answer is that length should follow the artwork, not the other way around. A design with a single subject and a soft background fits 90 minutes.
For recurring studio nights, keep the standard block consistent and let the design flex inside it.
Beginner Painting Class Ideas That Actually Finish
The best beginner painting class ideas share one trait: they forgive mistakes. Choose designs where a wobbly line or an overworked patch still reads as intentional, and completion rates climb.
Strong candidates include:
- Sunset silhouettes. Gradients hide brush marks, and a dark foreground covers a lot of sins.
- Single-subject still lifes. One bold object, one simple shadow, done.
- Abstract color blocks. No drawing skills required, and every result looks deliberate.
Skip anything with faces, fine lettering, or precise symmetry. A common mistake is choosing a design the instructor finds beautiful rather than one a first-timer can finish. Those are rarely the same painting.
This is also where a tool like PaintPrompt earns its keep. Describe an idea and you get a class-ready design with a 10-step guide, a color list, and a printable teaching plan, all built for beginners to complete rather than admire.
Build a Painting Class Supplies List and Budget
A working painting class supplies list covers five categories: paint, surfaces, brushes, water and cleanup, and protection. Budget by participant, not by class, so costs scale cleanly whether you host eight people or thirty. The mistake most new instructors make is buying retail quantities the week of the class; the fix is a per-station formula you reuse every session.
Per-station quantities that actually hold up
- Acrylic paint: plan on roughly 1 to 1.5 fluid ounces of total paint per student for a two-hour beginner canvas. That is about 8 to 12 small cups of color, each holding a tablespoon or less. Buy 8-ounce or 16-ounce bottles of the core palette and dispense into 1-ounce cups.
- Surfaces: one canvas per participant, plus one spare for every eight seats to cover a dropped or ruined canvas. An 11x14 inch canvas is the beginner sweet spot; 16x20 inch eats more paint and more time.
- Brushes: two or three per station, one flat about 3/4 inch, one flat about 1/2 inch, and one round for detail. Buy classroom packs rather than individual brushes.
Cost-per-student math you can reuse
Do the math once and it becomes a pricing tool. Add the per-station paint cost, the canvas cost, the amortized brush cost (divide the pack price by the number of sessions you expect to reuse it), and a small allowance for towels, cups, and covering. Divide by the number of students. Most practitioners find the consumable cost per beginner student lands in the low single digits to low teens in dollars, with the canvas usually the single largest line item.
A simple worksheet:
| Line item | Per student | Reusable? |
|---|---|---|
| Paint (dispensed) | 1-1.5 fl oz total | No |
| Canvas (11x14 in) | 1, plus 1 spare per 8 seats | No |
| Brushes | 2-3 | Yes, amortize |
| Water cup, towels, covering | 1 cup per 2, towels per 6 | Partly |
| Apron | 1 | Yes, amortize |
Sourcing and substitution moves
- Buy acrylic in larger bottles and dispense per station; small tubes vanish fast and cost more per ounce.
- Pre-mix the exact colors you need so students aren't guessing at ratios, and so you buy fewer base colors.
- Substitute heavy-body white for gesso only when you need opacity; gesso is cheaper as a ground but weaker as a mixing white.
Waste reduction and cleanup plan
- Dispense paint into cups, never let students squeeze directly from the bottle onto the canvas.
- Scrape leftover cup paint into a sealed container for the next session; acrylic skins over but stays usable for a surprising number of classes.
- Reuse water cups and palettes across sessions; rinse, don't replace.
Keep a labeled bin of "almost empty" paint bottles for warm-up exercises and color-mixing practice. It stretches the last ounce of every color and gives early arrivals something to do.
How to Teach Painting Workshops With Clear Demonstrations
Demonstration is the skill that separates a smooth class from a chaotic one. The rule we follow: demonstrate the whole painting once, quickly, then demonstrate each step again as students paint it. Two passes, two purposes.
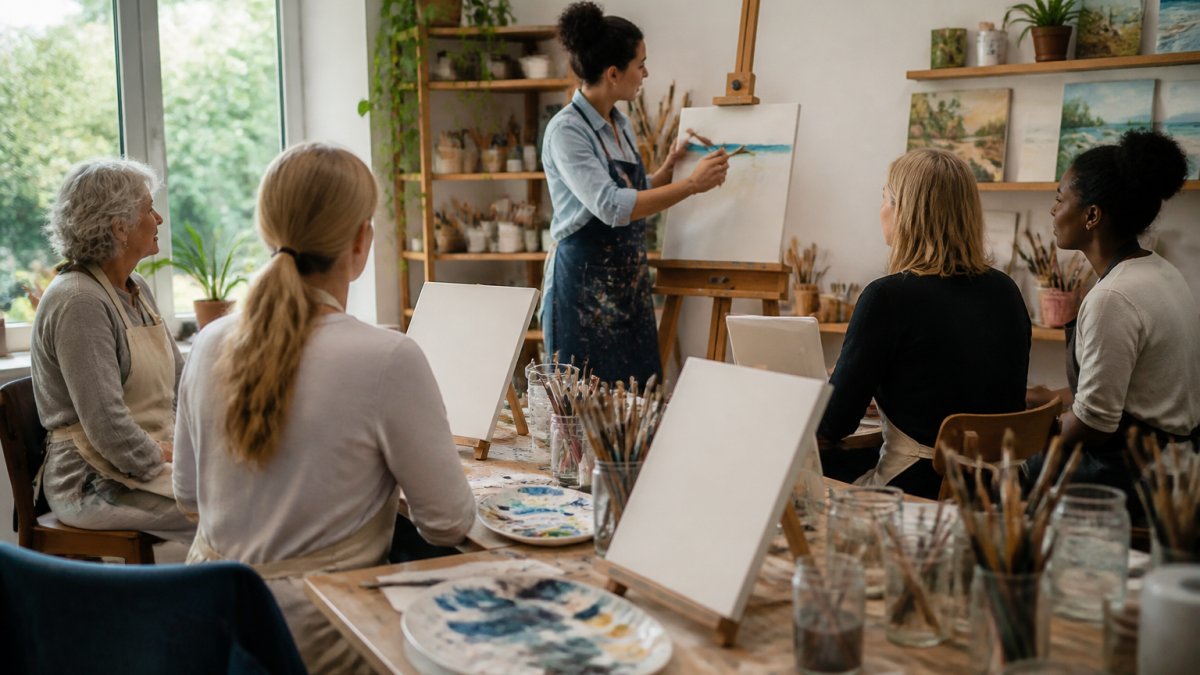
Keep your demo canvas visible from every seat. Angle your easel slightly toward the room, work standing, and narrate what your brush is doing in plain language.
Demonstration Moves That Keep Beginners With You
- Show the mistake on purpose. Paint a sloppy edge, then fix it. Beginners relax when they see recovery modeled.
- Count brushstrokes out loud. It paces the room and stops speedsters from racing ahead.
- Hold the brush up before you paint. Everyone looks at the same place at the same moment.
Set Class Size, Staffing, and Room Setup Before You Teach
Ratios decide how much individual help each student gets. For beginner painting workshops, one instructor per twelve to fifteen participants keeps the room moving. Above that, add an assistant who handles refills, water changes, and quick fixes so you never leave the easel mid-step. Below eight participants, the room feels thin and the energy drops; below six, consider merging sessions rather than running a half-empty class.
Staffing models that scale
- Solo, up to 12: you demonstrate, walk the room, and handle refills yourself. Build a two-minute buffer into each guided step for refills.
- Instructor plus assistant, 13 to 24: the assistant owns supplies, water, and cleanup so you stay at the easel. This is the most common profitable configuration for a beginner workshop.
- Instructor plus two assistants, 25 to 36: split the room into two halves for the walk-around portion, with the lead instructor demonstrating for both.
Room layout that prevents problems
Arrange tables so every seat has a clear view of your demo station, a U-shape or chevron layout beats straight rows because no one is looking at the back of another student's canvas. Keep aisles wide enough to walk with a full water cup, and stage supplies before anyone arrives so the first ten minutes are not a scavenger hunt.
Safety, ventilation, and paint handling
Acrylics are low-odor, but the room still needs air movement, open a window or run a fan on low, and never block the return vent with tables. Keep a spill kit within reach: paper towels, a spray bottle of water, and a lined trash bin. Post a one-page safety sheet at the door covering:
- Ventilation: air moving through the room, not just a ceiling fan stirring it.
- Spills: wipe wet acrylic immediately; dried acrylic lifts with warm water and a little patience, not solvent.
- Allergies and sensitivities: ask at booking about latex, fragrance, and pigment sensitivities, and keep a fragrance-free soap option.
Class size, staffing, and room setup are not separate decisions. Pick the ratio first, then lay out the room so the assistant can reach every table without crossing your demo sightline, and the safety plan follows from the layout.
Measure Outcomes and Turn Students Into Repeat Guests
Completion is the metric that matters most. If most of the room leaves with a finished painting they like, your lesson structure worked.
Then close the loop. Photograph every finished painting, share the photos with participants, and invite them back for the next theme.
A short follow-up message with the class name, a photo, and the next date does more for repeat bookings than any discount.
Frequently Asked Questions
How long should a painting workshop last for beginners?
Most beginner painting workshops run 2 to 2.5 hours, including setup and drying time. A 2-hour format works when the design has three to five blockable shapes and a simple background. Corporate team-building sessions often fit 90 minutes if the painting is small and pre-sketched. If you plan more detail, add 30 minutes rather than rushing the final touches, since beginners lose confidence when they feel hurried at the end.
What supplies do I need for a beginner painting workshop?
A working painting class supplies list includes canvases, acrylic paint in a limited palette, two or three brush sizes per guest, paper plates or palettes, water cups, paper towels, aprons, and table covers. Add a printed step guide or shape reference so guests can see the blocking order. Buy paint in larger bottles and pour small amounts per table to cut waste. Keep a spare set of brushes and one extra canvas per ten guests for mistakes.
How do you teach a painting class to beginners without losing them halfway?
Teach in short demonstrations followed by a clear instruction, then walk the room while guests paint. Never demonstrate more than one step ahead of the class. Use simple language like 'load the brush, then drag it across' instead of technique names. Pre-sketch the canvas or provide a shape guide so nobody stalls at the blank-canvas stage. Check in with quieter guests first, since confident painters will ask for help on their own.
How many students should one instructor teach at a paint and sip event?
A single instructor can comfortably guide 15 to 20 beginners, with a second helper once you pass 20. Above 25 guests, add one assistant per additional 10 people so you can give feedback without stopping the whole room. Staffing also depends on the design's difficulty and whether guests are drinking. For corporate groups with mixed experience, a 1-to-12 ratio keeps everyone moving and reduces the number of unfinished paintings.
How do you keep students engaged during an art class?
Break the session into short steps with quick wins early, such as painting the background in the first 15 minutes. Narrate what you're doing while you demonstrate, and give each step a simple name guests can repeat back. Move around the room during painting time and offer specific feedback like 'your horizon line is level, now add the sun.' A finished painting, a photo of the group, and a clear next step keep guests motivated and more likely to book again.
Are painting workshops worth it for people who have never painted?
Yes, when the design is built for beginners. A structured workshop removes the two biggest barriers: deciding what to paint and figuring out the order of steps. Guests leave with a finished piece in one session, which builds creative confidence fast. The key is choosing a composition with large shapes and a forgiving background, and giving every guest a printed guide so they can follow along without waiting for the instructor.
Running a workshop that finishes on time, with a room full of paintings people actually like, comes down to preparation you can trust. PaintPrompt generates class-ready designs with 10-step instructions, a color list, and a printable teaching guide in seconds, so you can plan a full month of classes in minutes and walk in ready to teach. Generate my class design and see how much of the prep work disappears.